Monday, September 27, 2010

Halloween crafts

Another season, another reason to craft!  Rather than dig out the same ole', same ole' Halloween decorations, I thought I'd try some new craft ideas.  These come from my favorite inspiration blog: One Pretty Thing.  I've said it before and I'll say it again, this is the best blog for craft ideas!  If I don't have time to go through my daily list of blogs, I at least go to One Pretty Thing.  I've been so inspired by all the lovely bloggers this site features.

First craft: Halloween plates.
This is from TheAnswerIsChocolate . I opted not to add the metal flakes as her tutorial showed, (only 'cause I did not have the supplies) but  instead covered the whole plate w/ paper.

Supplies:
Clear glass plates (local Goodwill $2)
Mod Podge
Sponge paint brush
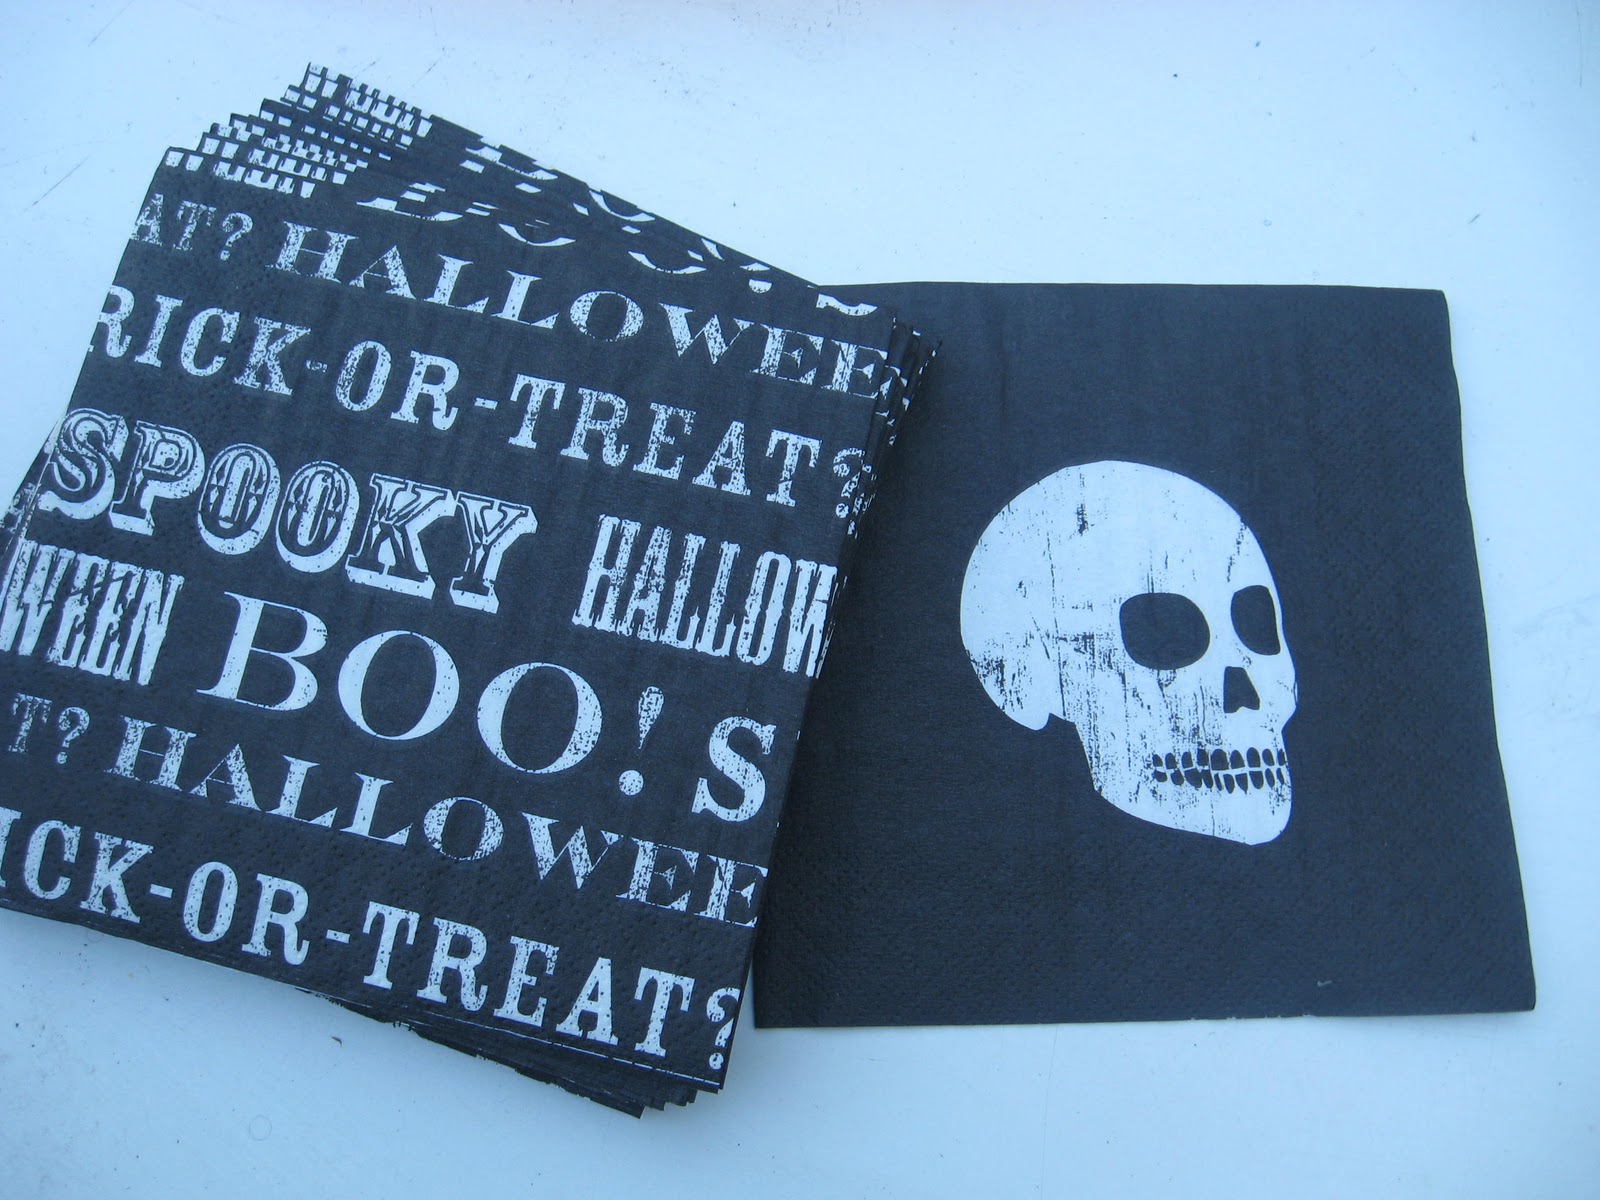
Scrap book paper and/or Halloween napkins (I used both)
Sharp Knife


Napkins from Target, $1.50. And you only use a couple so you still have plenty left to use for your Halloween party.


Step 1: Measure the bottom of the plate and cut out a circle to match from either the napkins or scrapbook paper.  I wanted the skull on the bottom, so I cut my circle with the skull in the middle of the circle.

Step 2: Paint just the bottom of the plate with Mod Podge. 

Step 3:  Press your cutout circle onto the Mod Podge on the plate with your fingers.  The object is to press out all the bubbles.  Then paint over the paper with more Mod Podge.

Step 4: Cut strips of paper a little wider then the width of the sides of the plate.  Paint one side of the plate with Mod Podge.  Apply a strip of paper to the Mod Podged plate as you did with the circle.  Press the paper down with your fingers, then cover the paper w/ a layer of Mod Podge.  Continue until all sides of the plate are covered.

Hint: If you are using stiff paper like scrap book paper, wet the strips of paper first to make it more pliable.  You want to make sure there are no bubbles and that all the glass is covered.  If need be, cut smaller pieces of paper to cover the gaps.

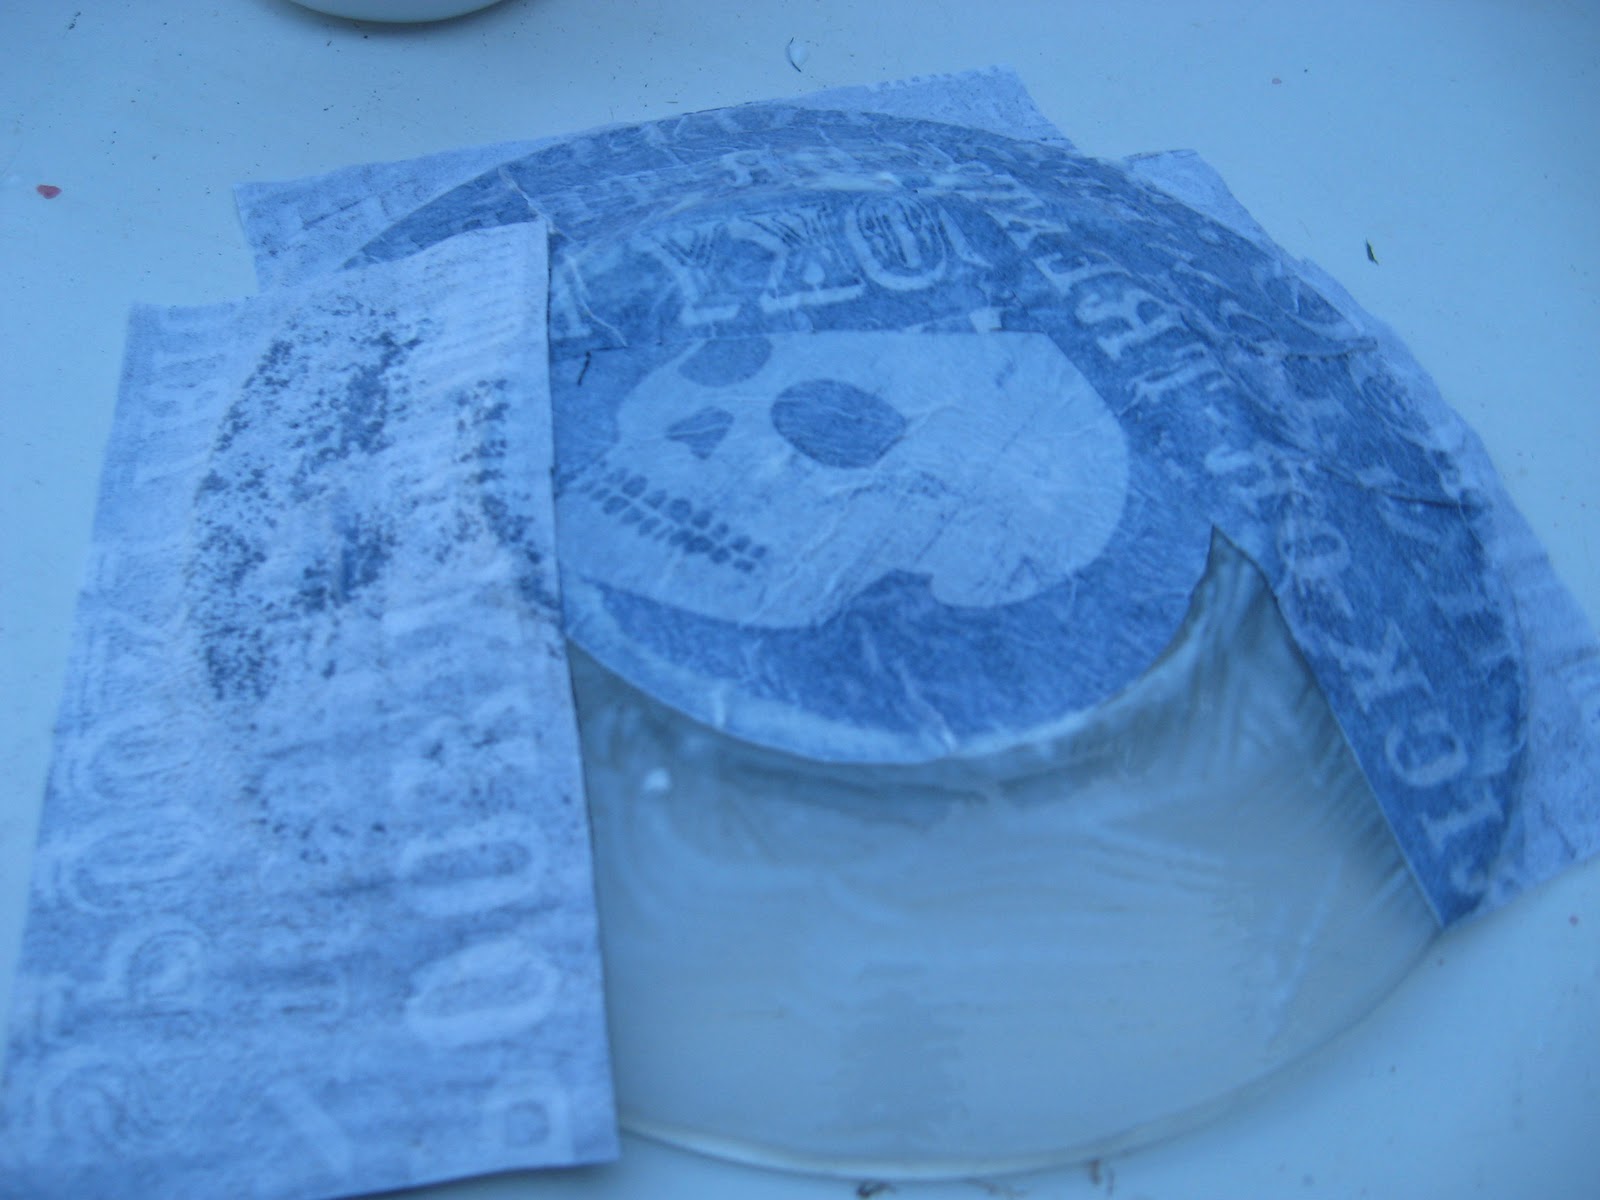
Step 5:  Once all paper is applied,cover the entire surface with another layer of Mod Podge.
Step 6: Let plates dry overnight. Or until completely dry.

Step 7: Once dry, use a sharp knife to cut off the excess paper around the edges.


Step 8:  Ta da!  You now have beautiful Halloween plates!  Obviously these cannot go in the dishwasher, but you can use a damp cloth to wash off the top after use.

For the large plate, I cut out the skull from the napkin, then used scrap book paper to cover the rest of the plate. I like the effect it had of the skull looking "ghostly".  On the smaller plates, you can see where I had some of the strips overlap the skull and since the napkin was pretty thin, it showed through.  Next time, I would probably not overlap black on white.  But I still think it looks pretty cool!

Second Craft:  Spooky Bottles
This is pretty simple.  I bought these "spooky" labels from the Dollar Store a couple years ago.  But you can also print off your own from this site: http://www.fantasyjr.com/printable-halloween-labels/ or from Just Something I Made or from The Graphic Fairy.  I use these sites for lots of fun free printables.

Step 1: Get some cool looking empty bottles.  (I keep used bottles just for this occasion.)

Step 2: Remove the labels by soaking under warm water and scrubbing w/ soap.


Step 3:  Apply labels w/ double sided sticky tape or Mod Podge or glue.  Your choice!

Step 4: Fill with colored water and oil.

Step 5:  Set out amongst your Halloween welcome center-piece.
NOTE:  The Boy felt that the Rat Poison needed something "extra" so he filled the bottle w/ rice.  Nice touch!

Third Craft:  Halloween Pictures

This idea came from The Graphic Fairy .  Talk about simple!  I did this craft while waiting for my kids to finish getting dressed Saturday morning.

Step 1: Print out picture of your choice onto card stock.
Step 2: Frame!


Hope you enjoy!  Happy Halloween.

Monday, September 6, 2010

Yummy!

Chocolate cake, blackberry pie, banana cream pie
Blackberry cobbler was a hit!

Recent Crochet Projects

Even w/ all the kid and summer activities, I've been able to sneak in a couple projects.

I found the pattern for these cute little flowers over at Easy.  She has lots of wonderful crochet ideas.  I took her flowers and added beads to the centers then attached them to bracellets and rings.  They would also make nice headbands.
The flower pattern came from Sew Ritzy-Titzy.  I just added a crochet leaf, although her fabric leaf I've logged away for another project.
Then my bags, oh my beautiful, fun bags.  I got the idea for these bags from one Future Girl's  blog. This link is to her free download page where you can download the pattern for her Starling handbag.  As you can see I took some liberties and added longer handles and embellishments.  I really need to go through her tutuorial on linings as mine didn't come out quite right....they were a bit off but the hand sewing covers it up...I hope.

 
This cross pattern comes from a silly little crochet magazine I receive in the mail.  I don't know why or how I started receiving this, but I do, and occassionally it has cute patterns that I can follow.